Ceramic Bead Artists Tutorial by Marsha Hedrick -- Making a Lentil Bead
Slip Casting Beads
Recycled Brighton Tin Cuff Bracelet and
Making Ceramic Beads
Painting Mimbres
Making a Lentil Bead
New Bracelet
Painting Lips, Cheeks and Eyes on Kids
Clay Play for Everyone
Making Ceramic Beads from 2-Part Molds
Making a Hollow Clay Focal Bead
Making Clay Tassel Beads
Glazing a daisy lentil bead
Houseold Items...Cool Looking Beads
Rolling Ceramic Beads
ABOUT FACE Necklace
Patching the pour hole in a poured bead
Pouring A Plaster Mold
Antique Lace Impressions in Clay
Making of a Bead Box
Making a Bead Measurer
Assembling a Hand formed Pendant
Pate' sur Pate' or slip trailing
Mold Making for Slip Casting
Stamping Ceramic Beads
Making Ceramic Beads
Making a Lentil Bead
By Marsha Hedrick
Share this Item with your Social Network friends.
(you need to be logged in to the social media) Tweet
(you need to be logged in to the social media) Tweet

SKILLS TAUGHT IN THIS TUTORIAL: This tutorial shows an easy way to make lentil shaped beads that are of consistent size and shape.
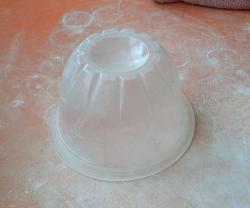
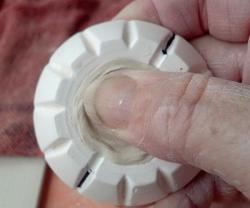
The first thing to do is eat the contents. Then mix up some plaster and pour it into the cups. You will need two for each lentil mold that you want to have. It is good to have several as that allows you to make more beads in a quicker time. Fill the cups about 1/2 to 2/3 full of plaster and allow it to cure. The plaster will pop right out of the cups if you haven't filled them up to the top. Just grab the edges of the cup and push down on the bottom and the plaster should pop right out.
An added benefit if you fill the cups about 2/3 full is that you can carve a design stamp into the flat side of the plaster for stamping pendants or other things.
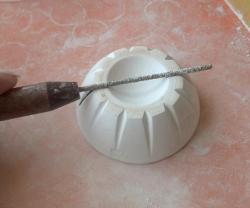
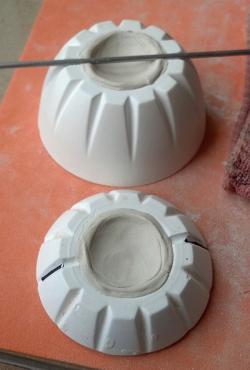
Next take a bisque saw (in the picture) or a file and file a groove directly across between two of the grooves in the plaster. Make this groove deep enough that your wire for the hole will fit down in the groove half way or a tiny bit more. Mark in the grooves of the plaster with a sharpie so its easy to recognize the groove for the wire.
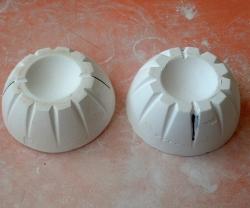

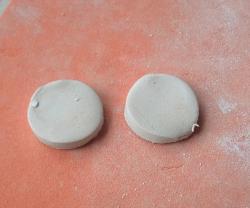
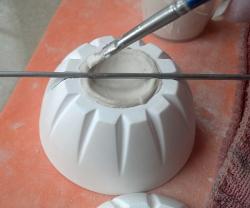
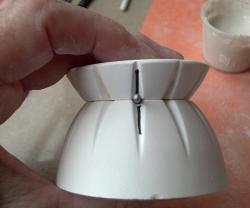
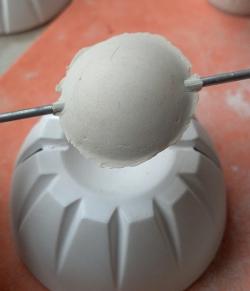
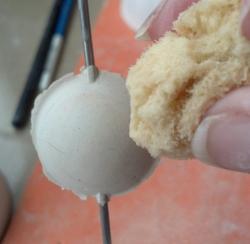
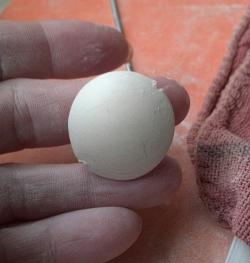
You have just created a nice even bead with a hole directly through the center. You can make multiples that will be very close to identical in both shape and weight. With multiple molds you can make lots of them in a pretty short period of time.